Hello reader..! few days ago i had to deploy a docker container to AWS Elastic Beanstalk. It's really easy to deploy containers using AWS Elastic Container Service. But if you want to pull a docker image from DockerHub we have to do some additional configurations. So i thought to SSH into the EC2 instance and play-around there. Let's see how i did it.
What is AWS Elastic Beanstalk ?
I hope all of you know what Cloud Computing is. A number of cloud vendors including Amazon Web Services (AWS), Microsoft Azure & Google Cloud Platform offers development tool to help make the process on deploying applications more simple and secure on a PaaS (Platform as a Service) model.
AWS Elastic Beanstalk is an easy-to-use service for deploying and scaling web applications and services developed with Java, PHP, .Net, Node.js, Python, Ruby, Go and Docker. A developer can easily deploy an application without provisioning the underlying infrastructure while maintaining high availability with load balancing, auto-scaling. You only pay for the AWS resources need to run your applications. Beanstalk allows developers to just focus more on developing code for their application rather than spending time on managing and configuring servers, databases, firewalls and networks.
Also, it has a CLI tool called EB CLI which you can use to deploy your application right from your terminals.
To Learn More : https://aws.amazon.com/elasticbeanstalk/
What is SSH ?
SSH stands for Secure Shell or Secure Socket Shell. It's a cryptographic network protocol that allows two computers to communicate and share the data over a network. It's used to login a remote server to execute commands and data transfer from one machine to another machine.
Step 1 - Creating an Application in EBS
As the first step we need to go to AWS console and navigate to Elastic BeanStalk. Then create a new application. I chose Docker as my platform.
 |
| Create New Beanstalk Application |
Once you create you application, Beanstalk will automatically create Auto Scaling, Security Group, Cloud Watch & EC2 instances for you as you can see in the below image. This process may take up to 5 minutes.
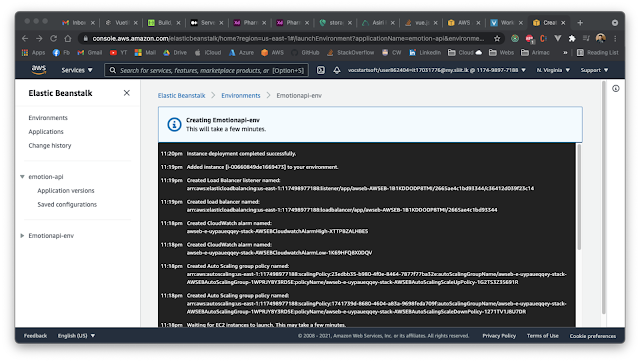 |
| Create New Beanstalk Application |
Once the application created successfully you may see the health status as Ok, if the application running successfully.
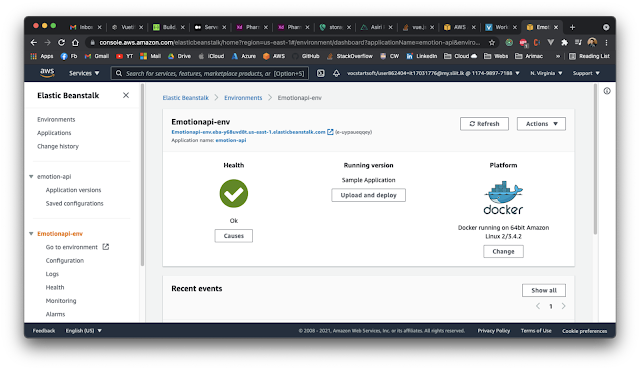 |
| Status of New Beanstalk Application |
Step 2 - Creating new Key Pair
Once we created a New Beanstalk Application an EC2 instance will be created automatically. So we have to create New Key Pair for the EC2 Instance and attached it to the Beanstalk Application.
 |
| EC2 Instance of the Beanstalk Application |
Go to Instances -> Key Pairs -> Create Key Pair
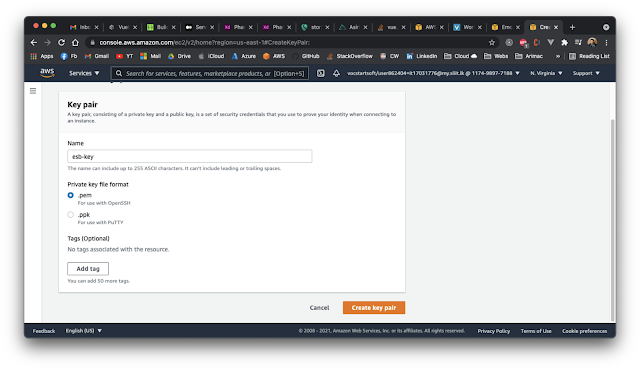 |
| Create New Key Pair |
Once you create a new key pair. Download the
key.pem file and store somewhere in your PC.
Step 3 - Change the Security Settings of Beanstalk App
Once we created a new Key Pair, we have to attach that key pair to our Beanstalk Application.
Go to Beanstalk App -> Configuration -> Security
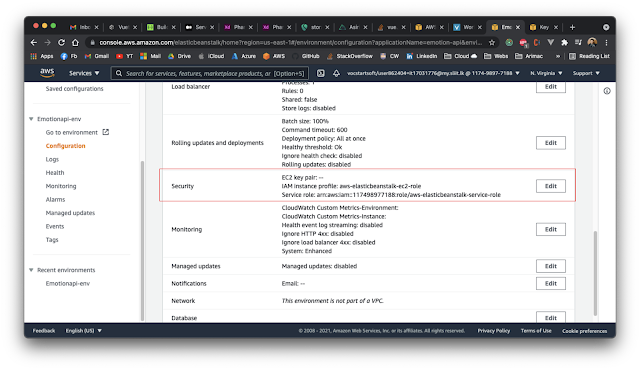 |
Beanstalk App Configuration
|
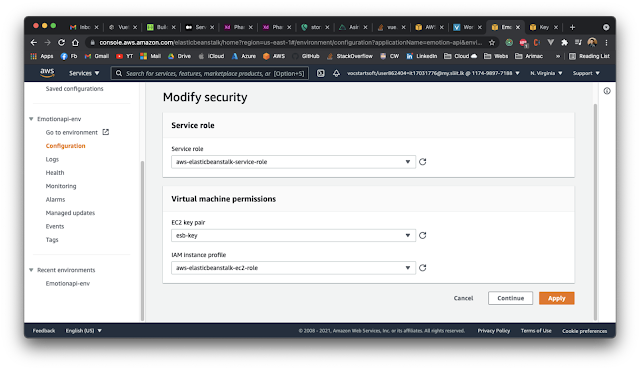 |
Change Beanstalk EC2 Key Pair
|
Step 4 - Enable SSH from Security Group Rules
If the SSH protocol not configured in the security rules, we may not allowed to SSH into the EC2 Instance.
Go to EC2 Instance -> Security Group -> Add Inbound Rule
Check whether SSH has already enabled. If not add a new inbound rule shown below.
SSH | tcp | 22 | 22 | 192.168.1.1/32
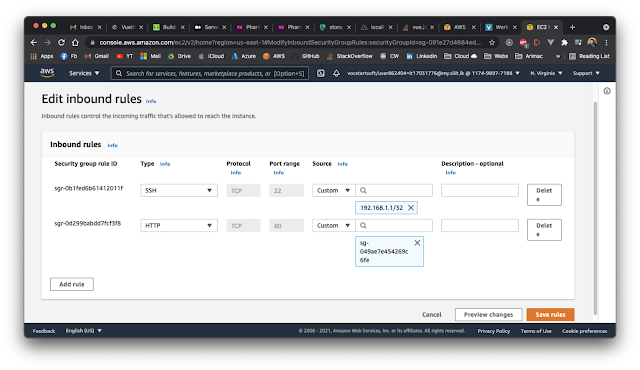 |
| Inbound Rules of the EC2 Instance |
Step 5 - Let's SSH into the Beanstalk EC2 Instance
As the first step here, we need to change the .pem file permission. So run the below command in your terminal. Make sure your file path is correct.
chmod 600 filename.pem
Once you changed the file permission you can SSH to the BeanStalk instance. Follow the below code. You have to replace the ip address or you can use public DNS as well.
ssh -i keyfile.pem ec2-user@3.86.121.132
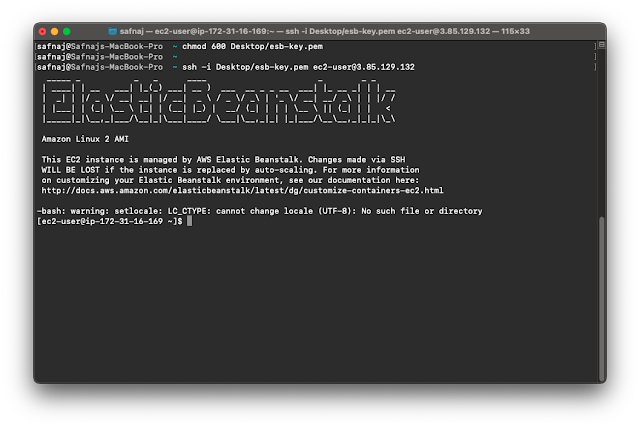 |
SSH into Beanstalk
|
Done..! We are successfully into the BeanStalk Instance.
Step 6 - Deploying a Docker Image from DockerHub (Optional)
It's completely an optional step. Since i chose Docker as the application platform i am going to deploy a container. You can deploy your web applications too.
For my final year research project, i have developed a web service which can recognise human emotions from the human facial images. So I've containerized the application and kept on DockerHub. Before running a new container, we have to stop or remove existing containers running on our application. There will be a default container running for all new BeanStalk Container Applications. You can use below command to check the status of the running containers.
"docker container ls" or "docker ps"
To remove running containers use "docker container rm -f container_id"
"docker pull safnaj/emotion-api:myapp"
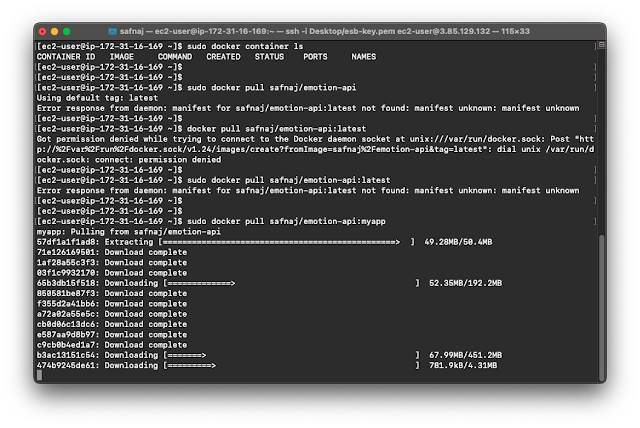 |
Pull Docker Image
|
Once we pulled the image successfully, lets check the image using "docker image ls" command.
Now we can run our container. Since i have deleted the existing container the port 8000 is free now. So let's deploy the container on port 8000 using below command.
"docker run -d -p 8000:8000 safnnaj/emotion-api:myapp"
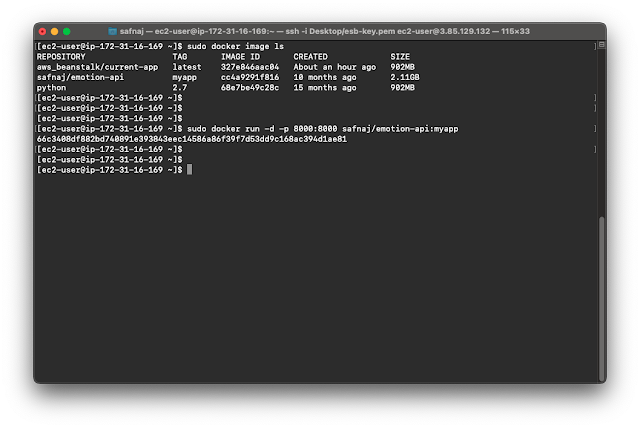 |
| Run Docker Container |
Let's access the application via the Public DNS and check.
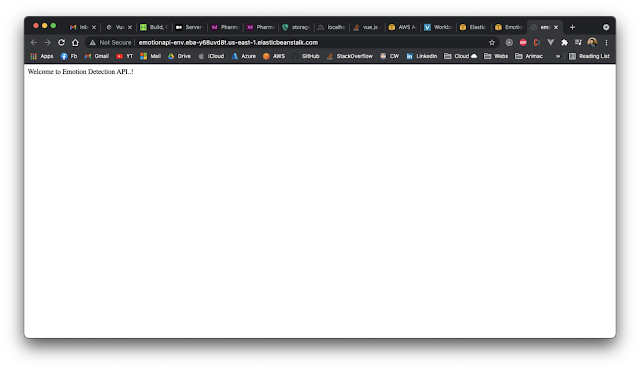 |
| Application Deployed |
Hooreyyy..!!! We have successfully deployed our container to BeanStalk by SSH into the BeanStalk Instance.
It's not a good option to SSH into the instances of the managed services. But if you want to reduce some extra steps and playaround with your instance, this method would be helpful. Always keep in mind to use this method for Dev or Testing Purpose.


0 comments:
Post a Comment
Thank You